Thursday, 29 December 2016

Christmas Napkins

 A few months ago I spotted a lovely little Christmas tree shaped napkin hanging in my favourite fabric shop. I purchased some fabric I'd had my eye on for a while now, but until now had had no excuse to buy it, and the owner was kind enough to give me a template. I was away!

2 FQ's (fat quarters) of contrasting fabircs makes 2 napkins as 2 pieces can be cut from each FQ.

It's simly a case of stitching right sides together, leaving a gap to turn in the right way.
 At this point I have 3 top tips:
1.)  I now keep a golf tee in my sewing box. This may sound bizarre but stick with me. My other half is a keen golfer and so I am not surprised to find golf tees in my car, hand bag etc. It just so happend there was one at my desk when I was turning my first napkin in the right way, and so I looked around for something to prod the corners with. I have in the past made the mistake of using sissors or a pen/pencil and rippign stright through the fabric. The golf tee is perfect, its not so pointed that it will break through the fabric/seam, but pointed enough to get the corners nice and smart.
2.) Top tip number 2 is once turned in the right way, roll the edges between your fingers to make sure all of the piece is in the right way and the seam isn't tucked in further than necessay.
3.) Now IRON! I was always one for missing out this step with any sewing, probably why it was never terrible accurate or precise. This is most definitely worth it, it not only makes your work look better but helps it to hold its shape when you go to topstich.


I was really pleased with how the first 2 sets of 2 came out that I went back for more fabric to make them into sets of 4.
4 set made up in different colours - minus buttons
Diamond Challenge & a few more napkins - When I set up my page I initally was just going to offer the one option of a postcard - I had calculated that I would need to make 12 postcards to get in 12 donations of £5 to make my £60. After posting a photo of my napkins on Facebook and receiving good comments I decided to offer a set of 4 as an option for a £10 donation. (The costs of all threads/fabric/postage covered by me). This idea took off and soon I had 4 orders awaiting my attention. 
The buttons really added the finishing touches.
Blue set, my favourite and soon snapped up.


Fabric Christmas Postcards

It has been some time since my last post, a post which was ranty and for that I have to apologise.

However I am back and have a whole list of post to write, so fingers crossed you won't have to wait long for updates. Many of the post subjects I have jotted down on my little post-it here were Christmas presents and so I am finally able to share them with you without spoiling any surprises. My creative juices have been flowing this last month and I have made loads... be prepared for the flood of creativity that will follow.

So, the question is - Where to start???

Christmas!! Let's do Christmas before we are too far into the new year and it because the unspoken subject again.

A bit of background - Back in October (doesn't that feel like a long time ago already), I joined a group on Facebook called 'Raggedy Ruff Free Motion Embriodery' (https://www.facebook.com/groups/1046433398787278/) and is run by a wonderful lady called Andrea. It's a group where lots of people are learning to Free Motion Embroider/Quilt (FME or FMQ). Andrea provides lots of support and a monthly pattern for everyone to have a go at and share. --> There will be more about this in a future post - look out for Free Motion Embroidery/Quilt.

Off of the back of joining the above group I became aware of a group called  'UKqu xmas postcard swap 2016', intrigued I looked a little closer and found that it is a group in which people sign up and make a fabric Christmas postcard. At the beginning of December they receive an address to post it to and in turn receive one in the post. I decided I couldn't pass up such an exciting opportunity and signed up. It was a lovely experience and a great group to be part of with everyone supporting and encouraging each other.
Here is the postcard I created:
I'm rather proud of it for a first attempted.
 
Diamond challenge & a bit more sewing - Inspired by this and my recent visit to receive my Gold Duke of Edinburgh award - another post coming soon. I decided to take up the Diamond Challenge (set up for this year to celebrate the 60th year of the scheme). The challenges asks/requires each participant to raise £60 to go back into the scheme. I thought for a bit about what I could do, it was a bit short notice to organised a sponsored something and I wanted my donors to receive something in return. I spotted my postcard prompted up on my desk awaiting its address and an idea sprung to mind. For a £5 donation I would create a one off postcard and post to the donor as a thank you. (I later extended this to include different Christmas gifts for different donation amounts - another future post will show these.)

I received 2x £5 donations in turn for postcards and can now show them without spoiling the surprise.
A little dancing penguin - happy chap!
Naked or hidden - There was a whole debate in the swap group about whether postcards should be posted 'naked' for all to see or hidden in an envelope for safe keeping. I decided to split the difference and posted in a clear plastic card sleeve - although this offers the best of both worlds - visible for all to enjoy along the way and all protected from rain/mud etc, I will have to consider this in the future as it's not exactly environmentally friendly.

I loved making these so much (also made a Christmas Pudd one, but seem to have been in a rush to post it and not taken a photograph), and am thinking I might try and get a head and get some made ready for next year - is that being too organised?? Maybe 1 a month, I have plenty of scraps of Christmas fabric now. Will keep you posted....


A belated Merry Christmas to one and all xx


Friday, 4 November 2016

2016 - I'm going to be proud!!


Warning this post does contain some ranting but also celebration. Let me explain... this morning I was in the process of writing a post for Facebook after (unusually) being irritated. I soon realised that a.) I need to let how I felt out and b.) it was a negative message and that I in fact needed to focus on the positives - a chance to remind myself what I need to be proud of. 


How it came about?


This post all came about after 2 weeks of solid work, little sleep and some awkward comments. Those who know me well know I'm a giver not a taker and generally not a complainer. I'm a get and go, get on with it kind of person and although I very much care and worry about what people think, I logically came to the conclusion in my teen years that if people didn't like me then they were missing out. Sadly whilst I recognise this from a logical perspective I find it harder to accept and what people say and think about me matters to me an awful lot. 


My rant - so to speak


So, I was irritated and upset by some recent comments from people suggesting because I haven't had a contracted full time teaching job post-surgery, that I must be doing nothing - sat back just waiting for something nice to come along. WRONG!! The reason I was irritated and so upset by these comments is because for the last 5 months I have been working 3, yes 3 jobs. Now it's not like me to feel the need to share/justify/explain this however having come home to hear/read comments along the lines of "Good 1/2 term? O' I forgot you're not working at the moment. So, I suppose it doesn't make much different for you" I have been left feeling disheartened. The reason this disheartened me is that I worked every single day of 1/2 term, early starts and late finishes including 6am starts and one stint that ended at 12:45am the following morning. I am not a lazy person, I want to and enjoy working hard and making a difference - whichever job it is I am doing, I will always give 100%. When I was recovering from surgery, even when I couldn't walk at all and was facing the prospect of learning to walk again, I was desperate to get back to work. 


Support


I do realise that people don't always know what's going on and may genuinely be unaware of what it is I am doing (I don't like to over share or complain about long days – that’s all part of life in my opinion). However, it was the assumption that I would be doing nothing that made the comments disheartening not the fact that people didn't have up to date info. I felt that maybe an update was needed to avoid those awkward foot in the mouth conversations. 


To the people who have been genuinely interested and supportive -THANK YOU! As you all know words of encouragement and kindness are invaluable and just the sort of boost you need after a long, tiring day.


It's not all bad


It was writing this that I was reminded that I deserve to praise myself because I have achieved so much this year - like most people I find this hard but knowthe value of recognising your achievements and am starting to get better at it. Yes I will continue to be annoyed that I don't have the security of a full time permanent contract however I have achieved so much. So I am going to be proud! Here are just a few of the things I'm pretty proud of this year.


  • Learning to walk, with just my temporary walking frame (nicknamed Gladys), new shaped feet and perseverance, however daunting the process seemed.
  • Stepping up to my role as chair of trustees (with a local charity) to make sure the organisation continues to flourish.
  • Initially started part-time work a few hours a week for the first time since surgery.
  • Getting back into the classroom 1 day a week to begin with, then 2 days, working up to full time cover for the last 1/2 term of the year. 
  • Leading a trip to London.
  • Pulling off a school production whilst on supply.
  • Supporting a week long residential. 
  • Getting my Gold Duke of Edinburgh finally certified and receiving my invitation to the palace.
 And so much more...

Now at the end of this post I have to confess I am feeling better and more confident. I have reminded myself how much I have achieved and to be grateful for. 

I have been able to squeeze in some creative and productive crafting over the last few months however am yet to document them - I hope to bring a more exciting and creative post soon.  

Friday, 3 June 2016

Having a go with watercolours

I've been wanting to have a go at painting again for a while now and whilst away I spotted a very reasonable set of little acrylic tubes and something I'd never seen before - watercolours in a tube. At £3 a set and £2 per canvas/watercolour paper pad, how could I not give it a go.

I sketched out a design whilst we were away and decided to have a go with the watercolours last night and tonight. It's been 10 years since I've painted anything but furniture or walls, demonstrating a wash background to a class of year 2's really doesn't count. With all this in mind I'm rather pleased with the result...

Thursday, 2 June 2016

Miles and Miles - An out of county adventure - Day 2: The BIG city!

Day 2 - The BIG city - London!!

Apart from seeing
friends, the main purpose of this trip or rather the reason for making it
now, was to do a recce for an impending trip to London. The aim to suss out
what is and is not doable access wise in London. To figure out
distances between places the group want to visit.

We started
the day with some lovely warm Croissants provided by our lovely host,
then it was down the road to the Three Bridges train station to catch
the train to London. We purchased our tickets and then hopped on the
9:36 which got us into London around 10:20. London Victoria station was
packed with queues at every ticket point. We must have been here for a
good 20minutes to top up an Oyster card. It was then down to the tube.
Certainly an experience for Cornish folk! From Victoria we went one stop
to Green Park before changing tubes (isn't that just fun with all those
stairs and escalators!) onto the Piccadilly line 2 stops to Leicester
Square. Thank goodness we had the lovely Laura who is a whizz at reading
tube maps etc. Upon exiting the tube station at Leicester square we
decided it was time for a beverage and spotted a Patisserie Valerie -
where we were very good a resisted cakes, just a hot chocolate each.


The
IMAX cinema and M&M world were both on the groups list of possible
things to do and so that is where we headed next. Premier square Or
Cinema land.


M&M
World it turns out doesn't open until 12noon on a Sunday and so we took
a walk down to Trafalgar Square to see the Lions etc. admiring the
architecture along the way - there are some beautiful buildings in
London. Interesting street artists including a levitating Yoda.


Whilst
here we decided to make the most of it and have a look in the National
Gallery - heading straight for the Constable, Turner and Van Gogh
paintings on level 2. The other half also pointed out that this was the
gallery Q met Bond, same leather seats and Bond commented that it was a "b****y big ship".


From
here we headed back to M&M world - after all it would be rude not
to! The smell of M&M's as you walk through the door is quite
something, 4 floors of M&M themed products from personalised
M&Ms (colour and wording or logo of your choice) to hoodies,
stationary, PJ's, mugs etc. it was endless. The bit I was interested in
though was the displays or M&M characters in famous poses/or as
famous people.


Above: Totally awesome lift.                       Loving the periodic table of M&M's above.


      Well we are in London after all. 


We had done a quick Google the night before to search for comic book shops - its London there had to be a selection. We found that there was in fact a Forbidden planet on Shaftesbury Avenue, which as it happens is between M&M world and Oxford Street (another place on the groups visit list). After a good ol browse of Forbidden Planet, which made the other half very happy (not least because he found the books he has been searching for for some time now), we headed across the street to an Italian restaurant - Wildwood Kitchen. Good food and not too terrible prices for London, I had a delicious Lasagne whilst the others plumped for burgers.


After our sit down at lunch time we headed to Oxford Street, I couldn't believe how busy it was for a Sunday!! You were swept along with the crowd and people were tussling for space in shops. We paid visits to: Hamleys, Lush (I'd seen the construction of their Oxford Street 'flagstore' on a TV documentary and was intrigued to experience it for myself) and I think that's about it tbh - it was just far to busy for us! We jumped on the tube at Oxford Circus and made a swift exit to Victoria Station. Here we sat for a drink and Krispy Kreme doughnut before catching the next train back to Crawley. I have to say it was exhausting!!


Miles and Miles - An out of county adventure - Day 1

I have just come back from a 'little' trip with the other half.

Day 1 - Travelling, Reading, Good friends
We left early (6am) Saturday morning and began the looong drive North East, leaving Cornwall behind by about 7:30 :(
We made a couple of stops along the way including one at Cribbs Causeway (Bristol) and another in Reading (as shock of shocks - we were early!! by about 2 and a half hours - there's a lot to be said for an early start to beat the traffic). 
Whilst mooching (I love that word) about Reading city centre we saw a small procession through the town consisting of 2 large puppets and a band.

After our little mooch and surprise procession we stopped in to see some very good friends of ours and deliver a late birthday present to a gorgeous little boy. We had a lovely afternoon with them in the sun in their garden and enjoyed some yummy fajitas - summer is here!

We arrived in Crawley about 8pm where we would be staying with another super friend over the next couple of days.

Wednesday, 11 May 2016

When April became May

As well as having started back at 'work' (starting supply work) I also have a few projects on the go right now. It's all been a bit chaotic right now, each day scheduled out, last minute calls from the agency - the nature of the supply beast.

Sock update - my plain pink socks are still a working progress, however I have been spurred on by the addition of two balls of new sock yarn to my yarn stash. I couldn't resist the new cocktail collection by West Yorkshire Spinners 😊 I did however limit myself to two colour (DK - not quite brave enough to go on to 4ply yet). Can't wait to start working with them, however will be a good girl and finish pink socks first. 
Blue Lagoon on the left and Rum Paradise on the right.
Sunflowers - who doesn't love sunflowers?! A friend of mine recently go their own place and during a discussion about the garden the subject of sunflowers came up. So I decided to plant some sunflower seeds and when they are strong enough to be outside, replant them into some nice sturdy pots for his garden.
Seeds ready for planting
All planted

10 days later
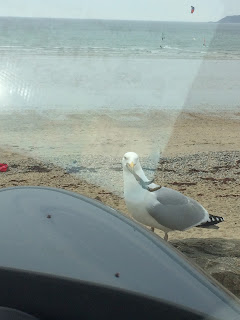
The seagull and the starfish - we decided to make the most of the little sunshine we saw at the weekend and headed down to Marizon with our picnic (left over chicken pasta bake, a sandwich and plenty of fruit). We were sat in the car overlooking the bay watching the wind and kite surfers performing their stunts (it was fantastic to see so many people out enjoying the Cornish coast), when this guy flew down and sat on the wall in front of the car. It took us a few minutes to figure out what he had in his mouth! 


Thats all for now. Keep your eyes peeled for at least 2 posts coming very soon!!

- Posted using BlogPress from my iPhone

Monday, 25 April 2016

Craft fair, friends and creativity

A couple of weeks ago I came across the events page on the Bedruthan Hotel and Spa website - https://www.bedruthan.com/arts-events/ Initially I only saw the workshops and shared the link with friends asking if they had tried any of the workshops there, it was then I realised the workshops I was looking at were organised as part of the Modern Makers: Craft and Design fair. A road trip was planned with 5 of us going in the end.

It was great to have a mooch (I love that word - mooch) over 3 floors of stalls and stands, artists displaying and selling their work. It was great to see other peoples creativity and writing this the next day I'm gutted I have work later as my brain is overflowing with ideas!

We also booked in on one of the workshops which was fab, lovely and relaxed. We went for the
Decorate a Wooden Hanging Heart Workshop with Lyn Glover. I thoroughly enjoyed it, sharing ideas with others, all starting with the same base but all coming out with beautiful and very different designs. 

Here's mine: 

We already have the Midcentury and Vintage fair in mind for our next road trip in October and of course who can resist a good Christmas Craft Fair in November. 
https://www.bedruthan.com/fairs-at-bedruthan/ 

I also have to say the views were just amazing from the hotel, and such a gorgeous sunny day too. 
Can't wait until next time. Thank you ladies for a lovely day :)

Saturday, 23 April 2016

April - Marizion, Mousehole, sunshine and Ice cream

Today was a gorgeously sunny day and so we decided to get out and make the most of it. After collecting the other half from St Austell way, I headed back down the A30, past home. A quick stop for petrol and we carried on down to Marizion, one of our favourite spots.
We love a good panorama
One of our favourite things about Marizion is if its too chilly to sit on or stroll across the beach, or my feet are not behaving themselves enough to allow a little walk, we can park up facing the sea. This means we can enjoy our picnic in the warmth of the car whilst admiring the views of Mounts Bay - the best of both worlds. Don't get me wrong we love the outdoors and try to get out into it as much as possibly, but on clear chilly days or even stormy days its nice to watch the sea from the warmth of the car.

After eating our packed lunch and braving a little sit outside on the wall (boy was that wind chilly), we headed further west to Mousehole for an ice cream.

A little more sheltered from the wind it was nice in the sunshine and even managed to park and walk down into the village - yay for another achievement. Here we indulged in a small ice cream each (well mango and passion fruit sorbet for me - which was delicious!). All in all a lovely day in the sun!

Only a short post today as off to a craft fair tomorrow and may feel the need to write about it later...

Sunday, 17 April 2016

Bunting - double sided this time! OOooooOO


If you have read my bunny bunting post and baby quilt post you will notice I am on a bit of a sewing run at the moment, and I'm loving it!


The bunny bunting, taken from a blog post I saw a link for on Facebook turned out well and I'm really pleased with it. You may remember me saying that I had originally picked out a browny/grey linen - this is that, I did promise it wouldn't go to waste.


I had already picked out the red and white spotty fabric and decided to do hearts - a nice simple shape to applique. 


I also gave the stitching around the appliqued shape a go this time rather than relying on the iron on interfacing. I was a bit nervous about stitching round to begin with but am really pleased...


... once you find the right speed for you on your machine, you're away. I found too slow was as equally hard as too fast, a fair speed meant the fabric flowed through the machine better for me and easier to control curves.


I decided I couldn't leave it there though and set about a cherry design on the reverse, making the bunting double sided. Again I printed and then traced cherry shapes onto interfacing. I traced the same shape multiple times, fairly close together.

TOP  TIP - Before ironing this on to my red fabric I put two tears into each traced shape, this makes removing the backing paper SOOOOO much easier!!


I then ironed the strip of traced  shapes on to the relevant coloured fabric and began cutting out.


The tears put in the interfacing before ironing made removing the backing paper MUCH MUCH easier and no frayed fabric edges trying to get just the backing paper off and not the glue too.


  For the cherry stem I started by marking the shape (an upside down y shape) I wanted in HB pencil. I then followed this line on my machine to make the stem.


Next I cut out the leaves out (using the same process as with the cherries - I traced the shape I wanted on to some interfacing and ironed on to the reverse of the fabric), peeled off the backing paper, place on to the bunting and ironed into place.


I then stitched around the edge (as the green thread was still in the machine) before changing thread and stitching around the cherries. After doing one flag I decided that I needed to not only outline the pair of cherries but define the line separating the cherries. The photo below shows the reverse of the flag with the cherries on to give you an idea of the stitching.


I then placed one cherry flag and one heart flag right sides together and sewed down the two sides to the point to form the 'bunt' (as I believe they are called). I trimmed the point before turning in the right way (I found one of my partners golf tees perfect for making the point pointy when turning in the right way - pointy enough to be precise whilst not going through the fabric or seam as a pencil would). Once I had sewn all the 'bunts'I pressed then - they look much better and more bunting like once pressed.


A quick trim to the tops and I pinned each 'bunt' in between the bias binding, leaving a 10cm gap between 'bunts'. I then stitched with the machine right across including between the 'bunts'.

And here is the finished product:


I did for a short time debate whether to alternate the designs (cherry bunt, heart bunt, cherry bunt etc.) but decided that the whole point of having designs on both sides was to have reversible bunting. By alternating the designs, when I turned it round it would look the same (fine if you're going to hang it somewhere where both sides can be seen) and therefore by putting all hearts one side and all cherries the other I could reverse it for a change.


I've loved making the bunting and have learnt lots. I could happily make plenty more in different colours and designs. If you have made any bunting I'd love to hear about it in the comments below, even a piccy if technology allows.

Bunny Bunting

I saw this link on Facebook a few weeks ago and fell in love the idea of bunny bunting. http://www.poppiesandpolkadots.co.uk/spring-easter-bunny-bunting-a-quick-easy-how-to/
I haven't worked with linen before but decided to give it a go. I picked out a browny/grey from my go to fabric shop to begin with but later spotted a charcoal grey elsewhere that would be more effective with the patterned fabric I picked out for the bunnies. (Don't worry this fabric definitely didn't get wasted - keep your eyes peeled for a future bunting post.) I would say when you're buying fabric however if the shop is reliable at cutting the fabric square/straight you only need to buy 40cm - beware not all fabric shops are very good at this, I find quilting shops cut more precisely whereas general fabric shops are more of a cut and rip kind of measure.
 

 Perfecting my rotary cutting skills I managed to confidently measure and cut my bunting triangles. I then printed the template on the above blog and traced it multiple times on to some double sided iron on interfacing. This made cutting easier and more accurate. I also got more shapes out of the fabric as could think about placing. It also made attaching the bunnies to the bunting easy - peel off the backing paper, place on bunting triangle and iron on - simples!
A tip to make peeling the backing paper off easier - before ironing the webbing/interfacing onto the fabric rip into the design. Once ironed on and cut out, peel from the rip - It makes getting hold of the backing paper easier and makes sure you just peel off the backing paper and not the glue too. 
The pom poms on this pom pom trim were the perfect size for bunny tails and brought a short strip. I cut the pom poms off the trim and stitched each one by hand to make sure they were secure - totally worth it for the effect. 

 Being my first attempt at bunting and over enthusiastic to produce something I didn't stitch round the bunnies - I will next time. Instead I went straight on to pinning the 2 triangles for each flag (one with bunny and one plain) right sides together and stitched down one side to the point and up the other, leaving the top unsewn.
 
 Using bias binding to finish the top means you don't need to stitch the top of the bunting triangles as they are sandwiched in the binding. Taking care to leave some bias at the beginning I carefully attached the first flag and continued to stitch over a 10cm (so there is a nice row of even stitching all the way along the bias binding) before inserting the next flag. 6 flags gives approximately 1.5m of bunting.

My only regret, is in my haste to see them finished, I did not sew around the bunnies before attaching the tails and making up the flags/bunts. This lesson has been learnt as you will see in the next post, keep a look out for more bunting!